
Ciiva - General
Contents
Configure the Ciiva preferences in the Ciiva - General page of the Preferences dialog.
Summary
The Ciiva - General preferences page is used to configure the default suppliers and currency, BOM analysis preferences, Ciiva account details, and the Vault connection details.
Access
To access the preferences, select the Ciiva - General page in the Preferences dialog (DXP » Preferences).
Options/Controls
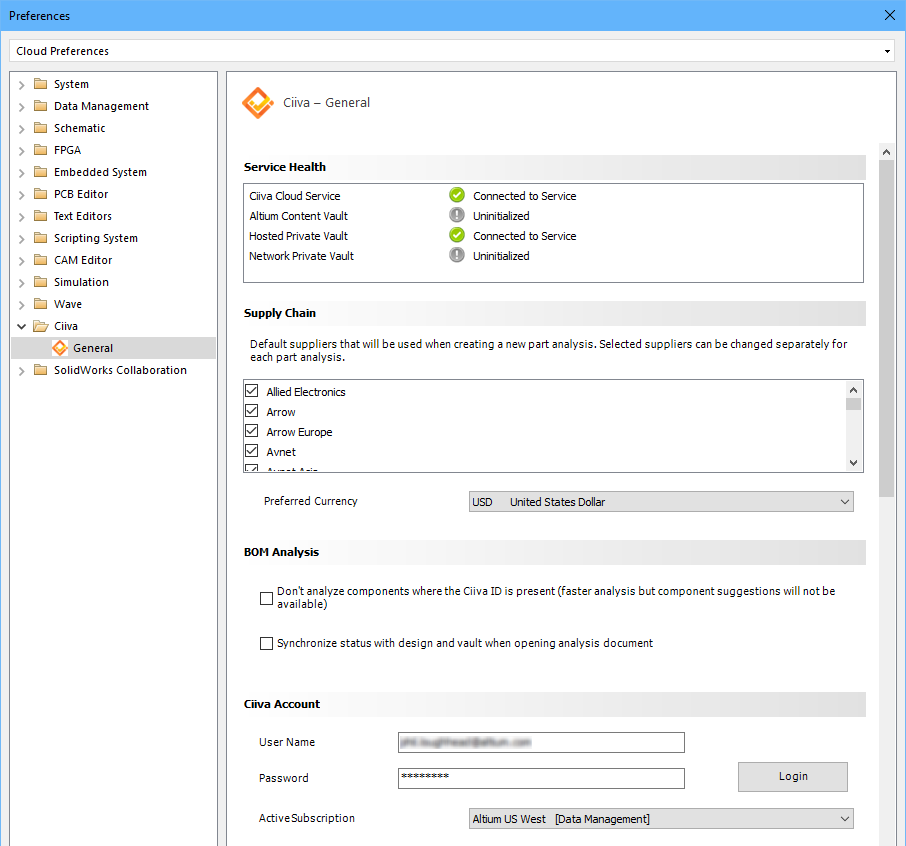
Service Health
This section displays the status of the cloud services and vaults available to Ciiva SmartParts. The Un-initialized state simply indicates that the extension has had to made a connection to that Vault.
Supply Chain
Supply Chain - enable your preferred default suppliers in the Supply Chain list. These choices can be overridden in each PartsDoc if required, in the Ciiva Analysis panel.
Preferred Currency - Select your preferred default currency in the Preferred Currency dropdown. This can also be overridden in each PartsDoc if required, in the Ciiva Analysis panel.
BOM Analysis
Don't analyze - The CiivaID is used as the link from the schematic component into the Ciiva component database. If the Don't analyze option is enabled, the analysis engine uses the CiivaID to locate the component in Ciiva. If the option is not enabled, then a full analysis is performed on that component, which may or may not return the same Ciiva component (it may not for example, if a newer, more suitable component has recently been added to the Ciiva database).
Synchronize status - If the Synchronize status option is enabled, then the PartsDoc is automatically re-synchronized to the design to bring in the latest changes, and then re-synchronized with the Ciiva database.
Ciiva Account
Ciiva credentials - To perform a Ciiva SmartPart Analysis, you must be logged in to the Ciiva database. Enter your Ciiva User Name and Password to allow database access when you perform a SmartParts Analysis. This will be the User Name and Password you provided when you signed up on the Ciiva site. You will have used your email address on the Sign Up page, this will be your User Name.
Login - Once you have entered your Ciiva credentials, click Login to allow your installation of Altium Designer to access the Ciiva services.
Active Subscription - Once you are logged in, the Active Subscription dropdown will show all of the SmartParts Solutions that your are subscribed to. Select the Active Subscription that you wish to use. Subscriptions are managed in the Dashboard on the Ciiva site, sign in to access it.
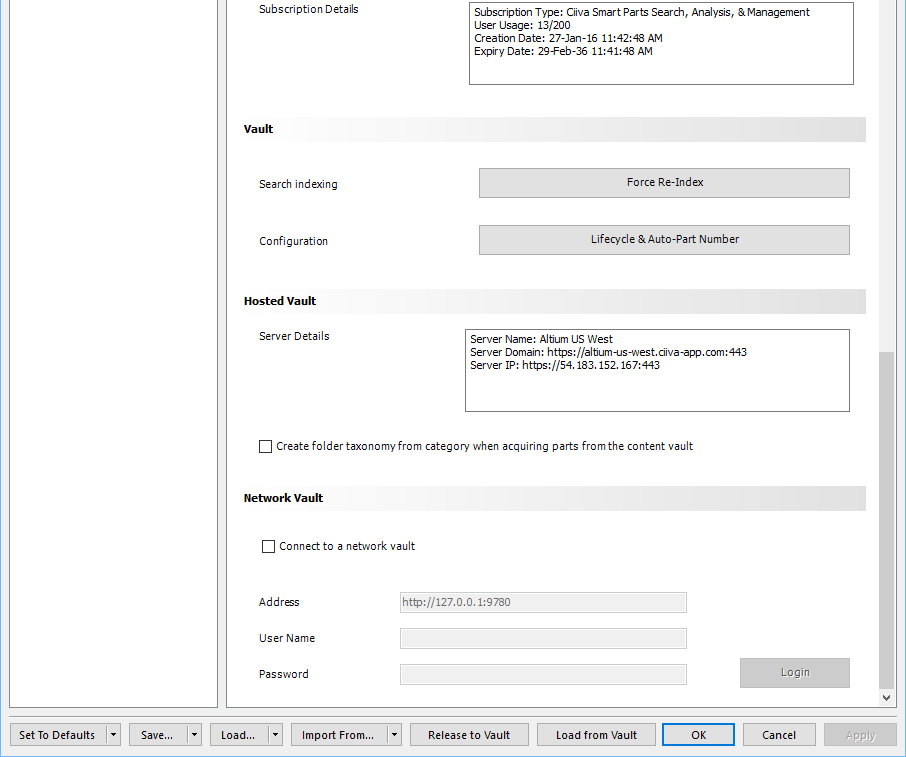
Subscription Details - Details the chosen subscription, including: the subscription type (Search, Analysis, or Data Management); the Vault user count and usage (for a Data Management subscription); and the subscription start and end dates.
Vault
Search Indexing - When the Force Re-Index button is clicked, your hosted Altium Vault is re-indexed. Note that the Vault is automatically re-indexed whenever you run the Update Vault command. Use the button to force a re-index prior to running the Update Vault command if you suspect there have been other edit actions performed in the Vault (such as deleting Items).
Configuration - Click the Lifecycle and Auto Part Number button to open the Vault Configuration dialog. This dialog is used to configure the automatic naming scheme used to name new Items, added when you run the Design » Update Vault command.
Hosted Vault
Server Details - This field displays the Name, Domain and Server IP address of the Hosted Vault chosen in the Active Subscription dropdown. Text in this field is selectable, so it can be copied/pasted if required.
Network Vault
As an alternative to working in a Hosted Vault, you can also use a network Vault. Enter the IP address and access port for the vault, in the form http://123.123.123.123:9780. To learn more about the Vault, refer to the Altium Vault page.